For the Titanic Boarding Party luncheon, portraying Dr Alice Leader, survivor of the sinking.


One of our costume guild members began planning an event for the anniversary of the RMS Titanic sinking on April 12, 1912. It was to be a Titanic Boarding Party luncheon at the Harbor House Restaurant in Seaport Village, San Diego, on April 1 7. We were each to pick a real person from the Titanic’s passenger list to portray, either a survivor or not, and try to come up with their story.
I chose Dr Alice Leader, who was more interesting than just being a 1st class passenger.
Alice and her husband John worked together as physicians at a practice in New York City. Alice boarded the Titanic at Southampton by herself as a first class passenger. She was 49 years old. She shared cabin D-17 with her friend, Mrs. Margaret Swift. Both she & Margaret were rescued in lifeboat 8.
After her rescue from the Titanic, Alice returned to work. She retired in the 1920s and was a frequent visitor to the Orlando, Florida area. Alice Leader died of heart failure in Florida on April 20, 1944; she was buried in Attica, N.Y.

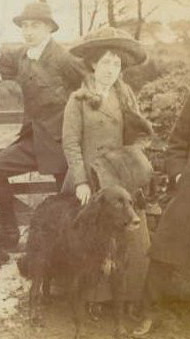
I began looking for something suitable for a first class passenger who was also a doctor. I liked the idea of a suit that could be worn while boarding the ship. Then I came across a photo of a hunting party where a lady was wearing a suit with a set of furs and it matched a fashion photo I had. I liked having lots of buttons and trims.


From here I gathered my accessories, starting with a hat I’d bought in 2004 from Mela Hoyt-Hayden at the Costume College Marketplace while I was there. I added my furs, an antique Edwardian parasol that was long enough to be a walking stick, and a smallish doctor’s medical bag I recently purchased in Williamsburg, and was the perfect size for a lady doctor.


I could only come up with two commercial patterns that were close to what I wanted to use, one by Rocking Horse Farms, or Wingeo 410 & 411. I already had the Wingeo pattern so I decided to use that. At some point, I still want to try the Rocking Horse one.


I’m using a lightweight suiting wool blend that I’ve had for about 5 years. It’s a light chocolate brown, and I bought some dark chocolate velveteen for the collar and trims. Unfortunately during that time some little winged beasties nibbled on some of it, so I had to recut one piece that was unsalvageable, but on the front with the lapel, I decided the lapel folding over would cover it. Besides I didn’t have enough fabric to recut that piece. To prevent stretching, I did a staystitch around all the pieces, & flatlined the front & back pieces with interfacing because of it being so lightweight.

I had a really hard time getting started on this Wingeo pattern. There is only one sheet of directions, and they’re minimal. It has a two collar option, one being a contrasting collar, but it’s not really clear how to do that, especially if you’ve never done a lapel collar before. I ended up begging for help and Jennifer Rosbrugh of Historical Sewing stepped in to try and decipher the directions. http://www.historicalsewing.com/ This was all done over the internet so it was confusing for both of us. Since the directions only showed a drawing of the jacket w/o a lapel, that confused me further. After a week of going back and forth, Jennifer was able to write up some new instructions for me and it was enough for a light bulb to go on and have an ah hah moment. Part of the problem was sewing the separate collar and it’s placement on the jacket so it lined up properly with the folded out lapel portion. The directions said to sew on the collar from the dots A to B. Except there were four dots and none were labeled. So when I finally sewed it, using the dots closest to the center opening, it didn’t lay down far enough to line up with the lapel.


This first photo shows the incorrectly lined up lapel collar. The second shows after I opened it up to the dot where it was supposed to match up to the dart on the jacket, it lined up properly.


I would not recommend this pattern for a beginner.
I sewed the sleeves on and then the belt, which I sewed by machine on a side seam on both sides, then hand tacked it to the front, leaving the back portion un-tacked. I read somewhere that it should stay loose since the back would tend to gather. I imagine if I had fitted the back portion a little more, I wouldn’t have had the looseness there. I wasn’t very happy with how the sleeves were fitting me at the shoulders, and then surprisingly in an Edwardian drafting class, it was discovered I had a very short shoulder line from my neck to the tip of my shoulder. So that explained why it was hanging down so low on my arms. So I had some help drawing a new line for my armseye and I cut off about 2 inches in, and reset my sleeves, which looked much better.
The belt made also of velveteen was attached to the jacket but I didn’t attach it on the back because it had some fullness that would have bunched up if I stitched it.

Once that and the sleeves were done, the rest went a lot quicker. The skirt also didn’t have much directions, and the only stumble made there was in the kick pleats which really didn’t have much to fold under the pleat but it looks ok. I forgot to take pictures of that while I was in “frantic-mode” of sewing for my event in three days.
My plans to cover buttons with the velveteen didn’t work because the fabric was too bulky. So I went in search of acceptable looking buttons. I found some at Yardage Town with a clover pattern cut out in the middle. They actually had enough of them for once. I used 6 large ones on the front of the double breasted jacket, four on each sleeve, and two on each side of the two kick pleats of the skirt. At some point I’d like to add a velveteen trim to the bottoms of the sleeves, but at this point, I’m just happy that it’s wearable.


The last part of this was my high necked blouse. I tried an Edwardian blouse I had on but the cotton sleeves fought with the cotton lining of the jacket sleeves and it was impossible to get it on. I almost didn’t get out of it. Plan B was a fake blouse, aka a dickie. I couldn’t find my pattern for making the blouse so I used another one for a high necked cape, Butterick 4952.
I just cut out the front and back pieces, with the collar. I shortened the bottoms of both bodies, and cut off part of the sides to even it out from the armholes, and just hemmed each side without having a side seam. The front seams and the collar overlapped enough to snap closures. I used a piece of antique lace from my stash and sewed one part around the collar, and then two pieces down the front on either side of the closure. I left a small area near the top for my Edwardian brooch to close it.


These photos were taken by Jerry Abuan. I didn’t realize until I saw the photos that when I put my hat on after getting out of my car and sticking my hat pin in, that I forgot to set it at an angle. This position isn’t the best angle for me or to show off the hat to its best. I also noticed the jacket wants to scrunch up too high above the waist after I’ve been sitting down. It causes the lower part of the jacket to pull at the last button. I don’t know if it’s too tight or what causes it yet. I need to get in the habit of pulling it down each time I get up.


We had our Captain Edward John Smith, and many lovely ladies.
More of my photos can be found here. http://www.pbase.com/cinnamonhrts/titanic_boarding_party


No comments:
Post a Comment